What is Goal Tracking?
Goals are the actions that you want users to take on your website. Goals tend to be intrinsically linked with your KPIs (key performance indicators); therefore, they actively contribute to the growth of your business. You are limited to 20 goals per Google Analytics view, so make sure they count!
When you enable goal tracking on Google Analytics, you will be able to track anything from how many people have completed your contact form, to how many people reached the checkout. You will be able to view the conversion rates for these goals, to see what percentage of your total website users actually completed the actions that you wanted them to. For example, if you notice a low conversion rate for your contact form, you can optimise it to increase lead generation.
With goal tracking you will even be able to set up a ‘funnel’, which allows you to pinpoint the exact page in the sales funnel that causes users drop off. This information can be absolutely invaluable, because it could show you that users are dropping off at the checkout stage – which might alert you that there is a problem with the page, or prompt you to simplify the process.
How Do You Enable Custom Goal Tracking?
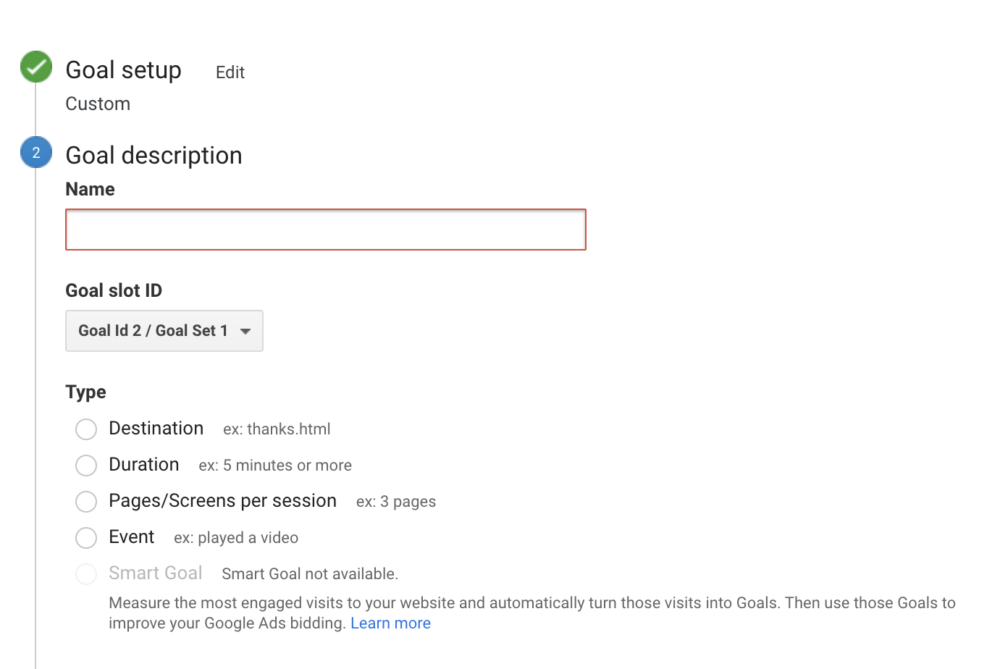
1) Set Up The Goal
Once you have signed in to your Google Analytics account, select Admin > View > Goals > + NEW GOAL > Custom. Then simply chose a name and find an empty Goal Slot ID.
2) Select Goal Type
There are 4 different types of custom goals: Destination, Duration, Page/Screens and Event.
Destination goals are perfect for tracking thank-you pages and confirmation pages. They can be used to discover the end page your user reaches after completing as specific action. For example, if you have a contact form to be filled out, you could set the destination goal to the thank-you page URL which appears afterwards, as this indicates that the user has completed the form, as opposed to just visited the page.
![]()
When setting up a destination goal URL, you will be able to choose a match type. You have three options: Equals to, begins with or regular expression. Choose ‘equals to’ if the URL will be the same every time. Choose ‘begins with’ if the start of the URL will be the same each time (if you’re adding custom UTM parameters afterwards). And finally, a ‘regular expression’ is slightly more complicated and uses special characters to enable flexible matching.
With destination goals, you can also turn on the optional funnel (as shown in picture above). This allows you to signpost certain URLs to measure how users move through your site and where they drop off in the funnel. For example, this could be really handy to monitor users moving through the checkout process, so you can track all the steps along the way to ensure your pages are optimised for conversions!
Duration goals are effective if you want to track how long your users spend on a certain page. They are so quick to set up; all you need to do is choose ‘greater than’ and enter the amount of time you want to count as a conversion. Average session time is around 3 minutes, so we have chosen 4 just to track how many users are really engaged!
![]()
Page/screens goals allow you to see how many pages your users view in a session. This is a great way to measure how engaged your visitors are, and they are so easy to set up. All you have to do is name your goal and select however many pages you would like to count as a conversion (we normally go for 3!). Then simply save your goal and any time a user browses more than 3 pages, it will track as a conversion!
![]()
Event goals are one of the more complicated goals to set up. They can be used if you want to track the percentage of users who click on something (e.g., click on an advert, watch a video or leave a comment on a blog). First of all, in order to create an event goal, you need to add an event tracking code (link) to the event you want to track.
![]()
Similar to destination goals, you can choose a match type. We have gone for ‘equals to’, as we don’t have multiple videos we want to track. Firstly, you can define a category to help you group a series of objects. Secondly, you can set the action. This will be the interaction you want your user to take – for example, play for a video or subscribe to a newsletter. Next, you can set a label. This is optional but gives you an opportunity to fill out more information about the event (such as the video title). Finally, you have the option to set a value – this can be monetary, or time based.
3) Track The Goals You Have Set
On your company specific Google Analytics home page, go to the side menu and click Conversions > Goals > Overview. Here you will be able to explore your goals and see the number of completions, conversion rates, abandonment rates and even more! Most importantly, goal tracking gives you a way to easily monitor the metrics which matter most to you and your business.
–
Whilst investing in time in setting up Google Analytics goals might not feel like a priority, the investment is sure to be worthwhile to see how many customers are converting and what they are getting up to on your website. If you would like us to set this up for you, please get in touch. This would go great hand-in-hand with an SEO strategy. We would be really happy to discuss what may work for you and your business. Email at [email protected] or call us on 01993 835 117.